


gluten free, dairy free, refined sugar free, peanut free, and so so good!
Did you know I used to be a Girl Scout? I started with my troop when I was in first grade as a way to make friends! I had just moved here from a different country and I wanted a group of people I could mesh with and call my forever friends. While some girls left our troop and others came in, I stayed until the end! I did Girl Scouts with the same troop (shout out to Troop 22442) for about 12 years. I did it all! The camping trips, the badges, the bonding activities, the trips to Savannah, and of course, the Girl Scout Cookies! Every year we were supposed to sell boxes and boxes to raise money for our end of the year trips. We could also win prizes, but we always wanted the trips… a very cultured little group I know! I was never great at selling them, but I could rock a cookie booth. We’d camp out in front of a Kroger and harass people until they’d buy a box (or five.) Once we were older, it was definitly harder to use cuteness to sell cookies, but we never gave up. We stood out in the snow once to try and sell cookies! We were very dedicated…
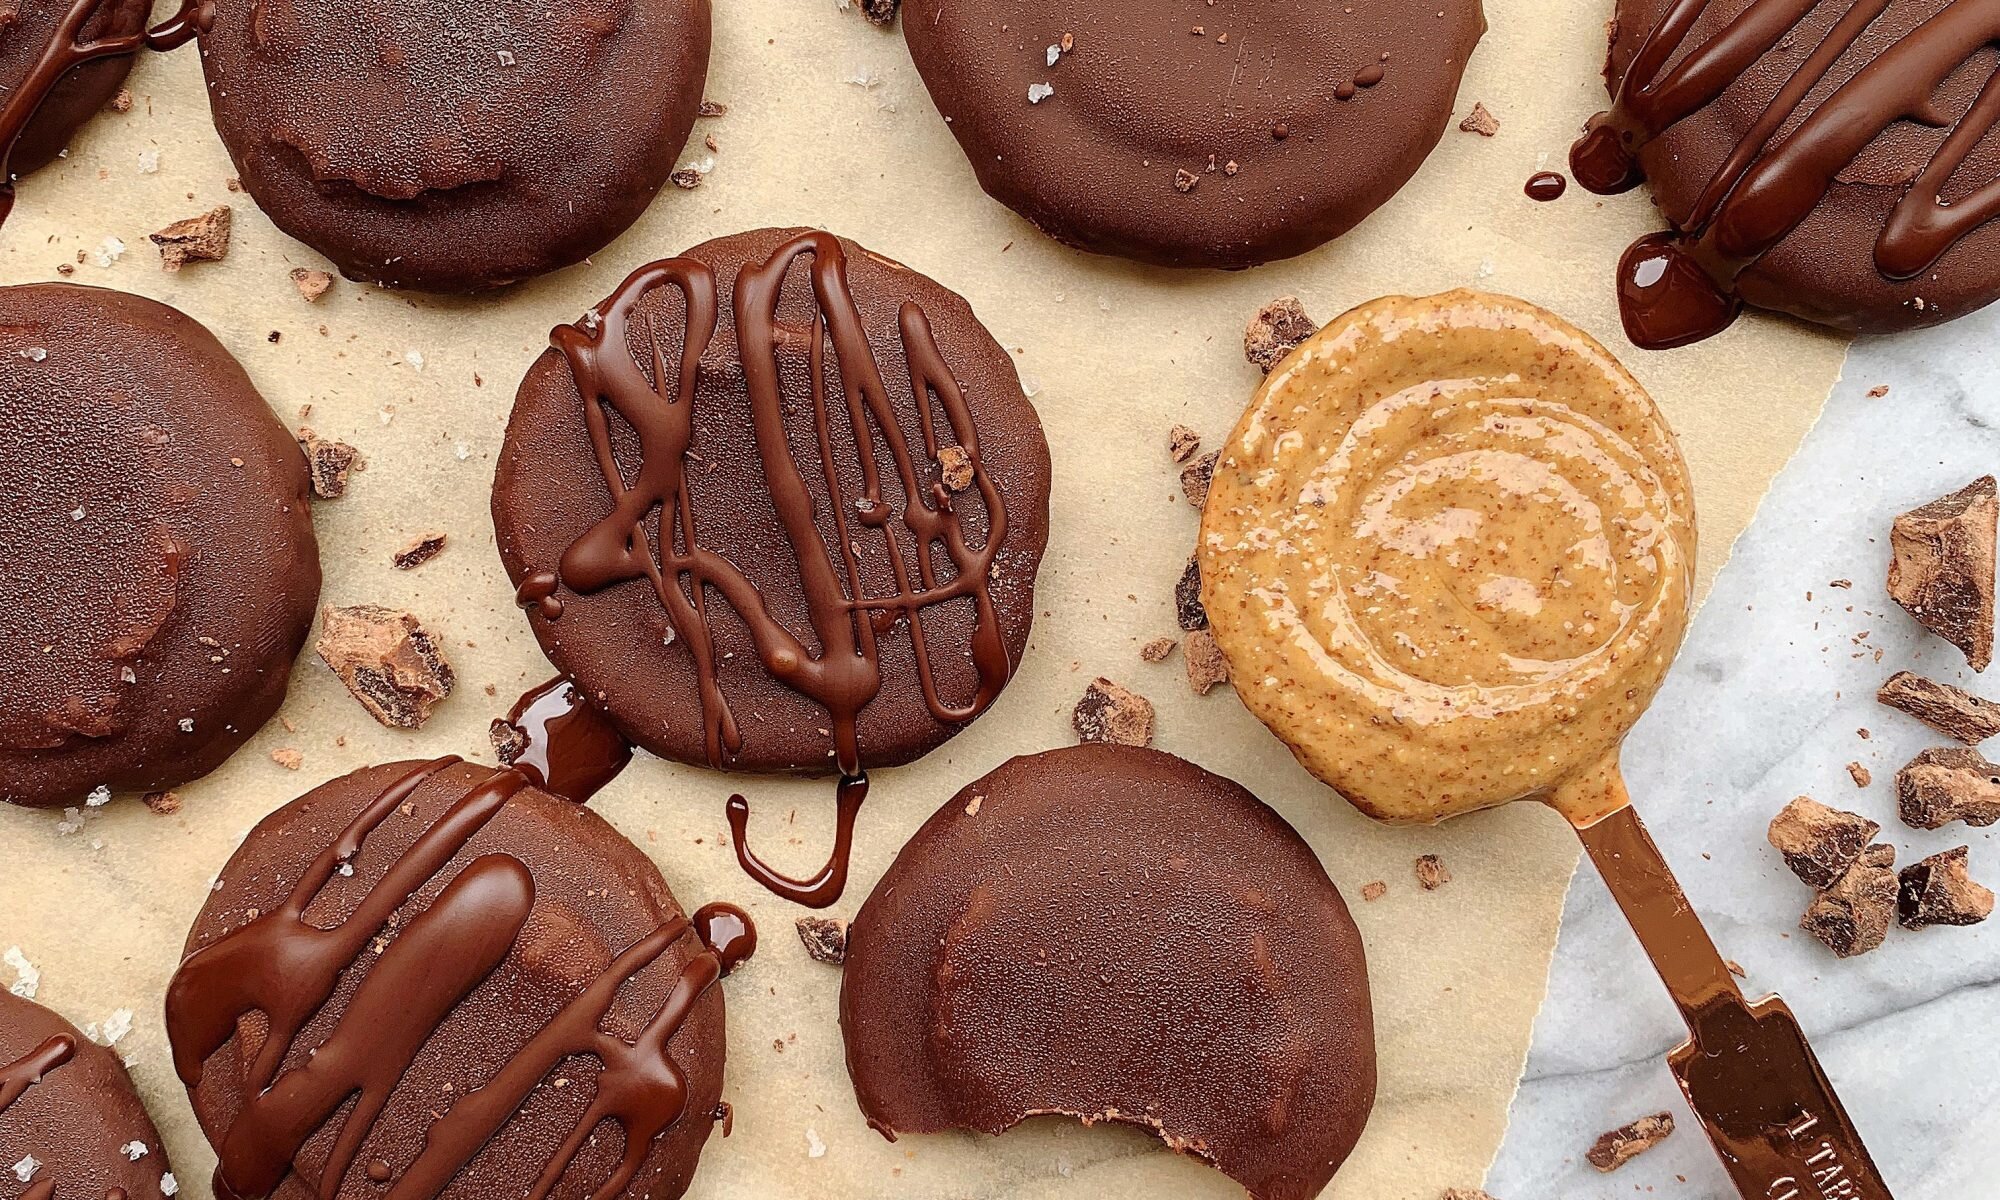
You can bet I ate my fair share of cookies. I was always my biggest customer. My mom would buy like 10 boxes and they would barely last a month at my house. My favorite cookies were always the Samoas, Thin Mints, or the lemon ones if you remember those! I never actually ate a Tagalong because peanuts hurt my stomach. I would hear how great they were and how much people loved them, but I never got to eat one. So I decided to make my own peanut free cookies! You can sub any nut butter here if you prefer it, but I used almond butter to make almond butter filled TAGALONGS. Hope you guys like them!
Ingredients:
Cookie Layer:
-
1 and 1/2 cup almond flour
-
1 cup oat flour
-
1/4 tsp sea salt
-
1/4 cup avocado oil
-
1 egg
-
1/4 cup maple syrup
-
1 tsp vanilla
-
1 tsp tapioca starch (to spread on surface to prevent sticking)
Filling:
-
About 1/2 cup almond butter
Chocolate Coating:
-
1 cup melted chocolate chips (or 1 bar melted chocolate)
-
1/2 tbsp coconut oil
Recipe:
-
Make the cookie layer first! Mix together the wet ingredients and stir evenly
-
Add in the dry and use your hand to mix. The dough should be thicker, mold-able, so a whisk won’t be able to mix well
-
On a non stick surface (I used a little tapioca starch on the surface to keep it from sticking) roll the dough out flat. The thickness is totally up to you! If you want a thicker/thinner base, make it! Just not too thin because you don’t want them to crack while baking
-
Using a circle cookie cutter (I used a mason jar lid) press out circles from the dough and place them on a non stick baking tray. NOTE: if you have excess dough that did not make it into a circle, roll it back together, roll it flat, and then press more circles out! Repeat this until you have no more dough left
-
BEFORE baking, use the back of a spoon and gently press down into the center of each circle cookie. This will stay while baking and will give you the perfect spot for filling later
-
Bake the cookies for about 20-23 minutes at 350 or until nice and golden brown
-
Let them cool and top each cookie with about 1/2 tsp to 1 tsp of almond butter. The dent you placed in each cookie earlier should give you enough space to hold the almond butter without is spilling off the sides
-
Melt the chocolate and drizzle or dip each cookie on top with the chocolate. I used a spoon and just poured chocolate right on top while the cookies were on the cooling rack. This allowed the chocolate to drip off the sides and coat evenly. OPTIONAL: top with a pinch of sea salt
-
Store them in the fridge overnight so the chocolate can harden and enjoy! A lot of steps, but worth it, trust me!

Comment on this post